How To
Prepare Registrations For Entry
Proper preparation will help every organizational aspect of your show. The best place to catch a mistake is before it is entered into the system.
The numbers calculated here are the numbers used to check, tie out, and make sure that no entries were missed by comparing to each sheet to the Exhibitor Entry Summary Report.
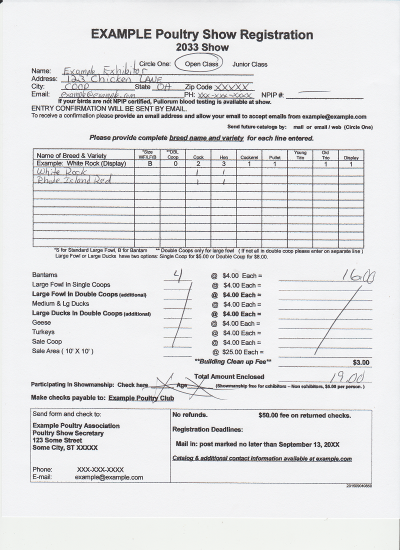
- Step 1 – Check that all necessary information is entered on the registration.
If information is missing or there are questions, set the entry aside
in the "Has Questions" stack, until the exhibitor can be
contacted to answer the questions.
- Step 2 – For each exhibit column on the registration, add and total the
exhibits in the columns for cock, hen, cockerel, pullet,
etc... Write the total of each column on your entry form and the
grand total of exhibits at the top or bottom of the page.
The total of these columns of exhibits should match the amount that
are paid for on the registration. If the numbers do not match,
check the math, and set this entry aside in the "Has Questions"
stack, until the exhibitor can be contacted to answer the
questions. (See the edited example form)
- Step 3 – If everything above is correct, then mark paid on your registration
form. 3 hole punch these sheets and set these into your
"Ready to Enter" stack for entry.
Entering Registrations Into the System
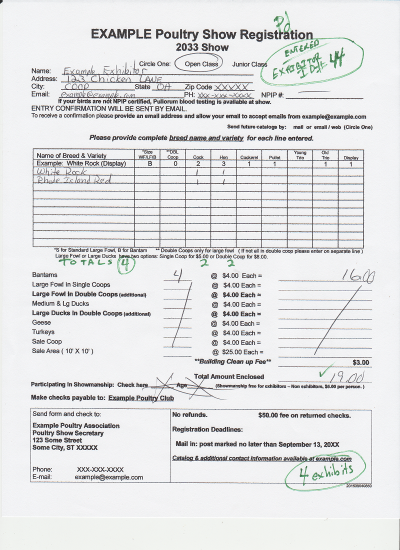
If the entries are checked before entering then the entry process is faster and easier to keep organized. Notice the green writing on the sample form. Each of these markings are described in the following steps.
- Step 1 – Enter the exhibitor information into the Poultry Show Manager
Program. This step may be skipped if the information is
already entered. An exhibitor number will be assigned by the
system. Write the exhibitor number on the registration form.
Double check spelling of the exhibitor's names.
(Top Right #44 in the example).
- Step 2 – For each row of exhibits enter the information. If there appears
to be a problem with the exhibits that was missed earlier contact
the exhibitor or set this entry aside in the
"Has Questions Partially Completed" stack, until the exhibitor
can be contacted to answer the questions. The item can also be
marked to check later.
- Step 3 – Once all entries are completed the totals on the exhibits screen
should match the totals on the show entry registration form. If the
totals do not match then something has been added wrong or entered
wrong. Find the problem before continuing.
- Step 4 – Make a copy or scan of the original entry form and
3 hole punch it. Have 2 notebooks: 1 for the open show and 1 for
the junior show that contain all of the entered entries in
alphabetical order with dividers. This should be at the show
in case an exhibitor has a question about the original entry.
This book will also be used when comparing information to reports
before final printing of the show reports: judging sheets and coop
cards. Place the second copy in another location for safety.
- Step 5 – (OPTIONAL) Have a second person assigned to review each entry.
Once that person approves the entry then send the confirmation to
the exhibitor. A checkmark may be placed on the form to mark that
it has been confirmed, but the system already keeps track of when
an entry has been confirmed.
- Step 6 – If the exhibitor has a problem or a change with the entry, follow your show's policy, and repeat steps to enter the change. Changes should be logged with the time of day and the person that was spoken to or a copy of the email, just in case there are questions later.